
ABOUT ME
 My Blogs allow me to rant and rave about movies, scrapbooking, motherhood, saving money, and whatever else I'd like. I'm finding it to be a great release for me. I hope that others enjoy it as well.
Click my name to find out fun facts about Moi
I've been searching for some last minute Valentine crafts and things and thought I'd share some stuff I saw along the way. These could make for some fun weekend projects:


Another packaging idea I liked was this foxy Valentine favor box by P.S.
 There's a tutorial for these heart breaker Valentine's on Dana Made It. So cute!


I've never really done much as far as decor goes for Valentine's day, with the exception of a huge banner I'd done one year made up of a million I love yous (very time consuming), but I like this chain made from personal photos.
Along those same lines, I also liked this card holder from Lemon Tree Creations.

Here's another Valentine wreath that looks pretty simple from Sassy Style.

 And if you're sick of wreaths, here's some Valentine trees, which are definitely different.

Nichole Heady has a tutorial on a very creative Valentine gift: "a cupcake take along".

Another packaging idea I liked was this foxy Valentine favor box by P.S.
This pounded wire heart pin by Can't Stop Making Things is so simple that you have to love it. Check out their site for more great finds like, love potion No. 9 wine stopper


I've never really done much as far as decor goes for Valentine's day, with the exception of a huge banner I'd done one year made up of a million I love yous (very time consuming), but I like this chain made from personal photos.


This is something I recently did for my husband, something that might make a good Valentine's Day gift.


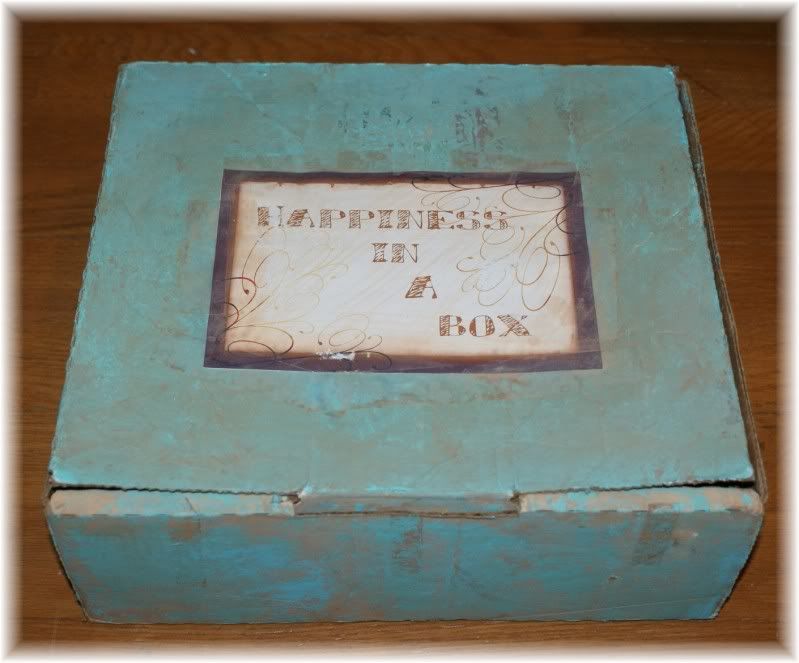
I just took a cardboard box, painted and aged it. The idea was to make it look like an old treasure box.
It originally had gifts that filled the box, but he'd taken those out before I took the photo. There are still a few wrapped gifts that are to be opened at specific times: when he's feeling tired, feeling overwhelmed, stuff like that.
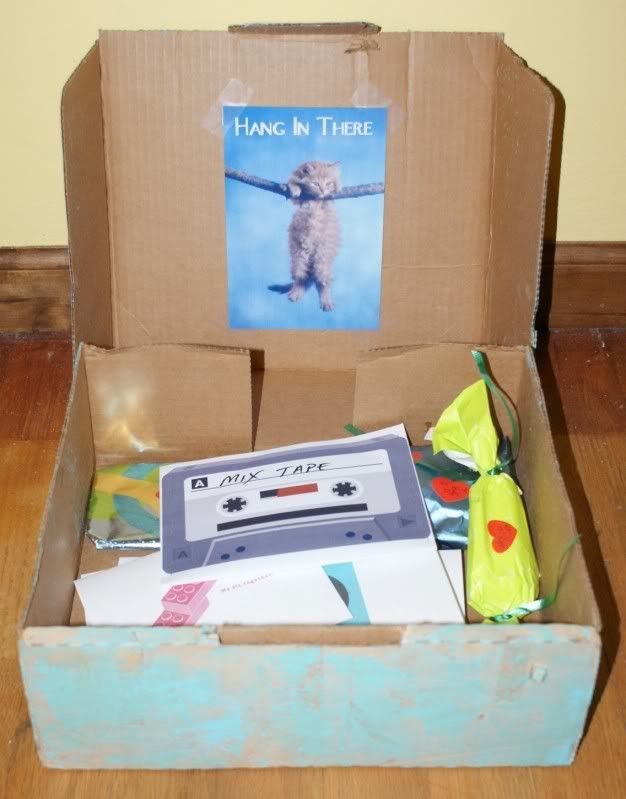
The "Hang in there" kitty is meant to be a joke.
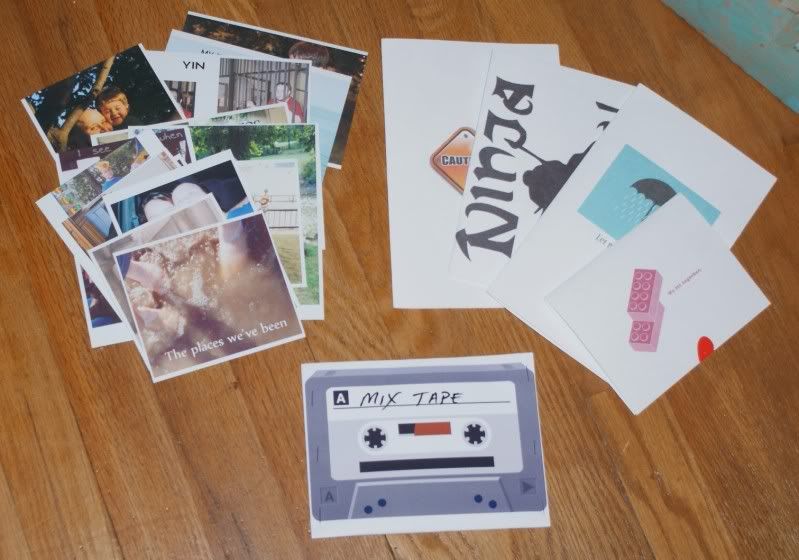
I did a mix CD of songs to brighten his day. Then printed out the cassette tape sleeve because I'm old school. I made cards that are sealed, meant to be opened when he needs them. The photos are of our times together, things that would make him smile.
Basically, the box is meant to be something he can go to, on his bad days, for a little pick me up. I will refill the box as things are taken from it, so that he can always rely on it.
It's a little early, but Valentine's Day is coming soon and love is in the air. So I thought I'd share a project I did a couple years ago, for our 7th wedding anniversary. The gift theme was wool. I used and old wool jacket to make a boy scout themed gift, badges and all.
 I created the "badges" on fabric squares using a stamp set. I attached them with fabric glue - no sewing involved!
 The special part was the "key" I added to the inside, explaining what he's done to earn each badge. In other words, all the symbols represented something special about him. I attached the key to cardboard and there you go. I'd like to think he liked it as much as I hoped he would. If nothing else, I thought it was original.


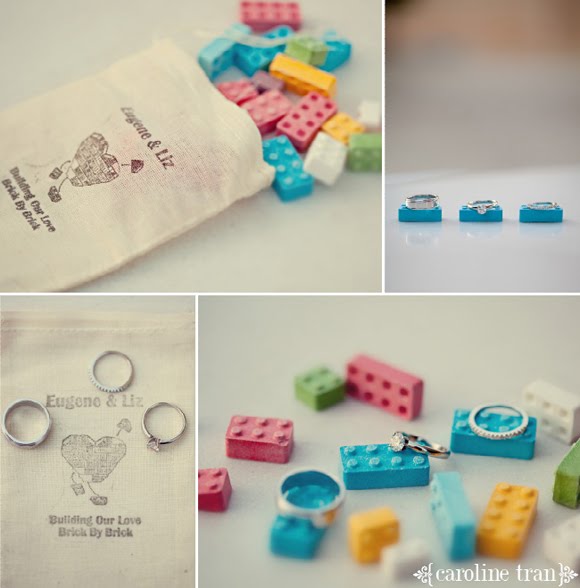
The thing is, my husband LOVES Legos. He's obsessed in fact. I don't know that these would interest him, but I always think of him when I see these little things around and so I thought I'd do this post for him.
 I can't believe I'm doing it, but apparently I'm jumping ahead to Christmas time with this Lego ornament.
As much as my husband loves Lego, he has never made an ornament and now I think it's about time.
 I don't know that I would want a Lego purse, but I bet my son would like a lego lunchbox. I'm thinking that wouldn't be too hard, depending on how complicated you tried to make it.

As much as my husband loves Lego, he has never made an ornament and now I think it's about time.
 I don't know that I would want a Lego purse, but I bet my son would like a lego lunchbox. I'm thinking that wouldn't be too hard, depending on how complicated you tried to make it.
Intimate Weddings has Lego wedding, complete with Lego cuff links, cake toppers and place cards. Ah, if only we were more creative in our younger years, I know my husband would have loved this idea.

Unplggd has a NES tutorial. If you're a Lego fan, you have to check out this site in it's entirety because there's tons of good stuff, including a home office made from Legos.


I was given a good size trunk like many of us probably have. I know I used to have one when I was younger. This one was blue with a gold frame and had stickers all over it. I scraped those off and gave it a coat of black.
 I knew I wanted it to be like a pirate chest so I decided to do a treasure map with the X being the X in my son's name.
.JPG) I just free handed all the painting and lettering. I figured it was fine if it looked really rough. I don't think pirates were known for their art skills.
I just free handed all the painting and lettering. I figured it was fine if it looked really rough. I don't think pirates were known for their art skills.
 My husband had bought these wooden cutouts and so I decided to work around them.


.JPG)


I'm pretty happy with how it turned out. It was a fun little project to do.
Here's just a few last minute finds for Halloween:
This Blood Slide Candy from Forkable would be good for many party themes, Dexter, mystery/C.S.I., Halloween, you name it. See other Dexter party ideas here.

Take a plate, glue it on a bowl, add legs and eyes, and you've got a spider plate. Thanks to She Wears Flowers for this easy idea.


 I love how simple and how cute this eyeball bag is.
Same goes for this Oogie Boogie Monster. These would make great treat bags for your kid's school.
I'm not sure what I'd do with these Paper Mache Witch Boots by Mieljolie but she has some neat ones.


Take a plate, glue it on a bowl, add legs and eyes, and you've got a spider plate. Thanks to She Wears Flowers for this easy idea.


Don't forget the centerpiece. Lil Luna made the one above.
 I love how simple and how cute this eyeball bag is.
Same goes for this Oogie Boogie Monster. These would make great treat bags for your kid's school.

I'm kicking myself that I didn't get any pictures of the whole scene after it was done. Thankfully, I snapped this pic in the midst of decorating. I wish it was clearer, but I was sure I'd get more. Frankly, the party went so fast, between entertaining, pictures and videotaping, I didn't get everything like I would have liked.
 You can see we did a spider above the light with streamer legs. There are red polka dot "ladybug" and yellow striped "bee" balloons up in the corners.


.JPG)


 You can't have a picnic without a picnic basket. Well, all I had was a sewing basket with sewing decor around the edges. So, I bought some clearance watermelon ribbon and stuck it on with some tape. Nobody was the wiser.


We did big green grass around the house with bugs.

I had a huge cardboard tube that I knew I had to use, so I covered it in crinkled paper bags and topped it off with green balloons to make a tree.
.JPG)
My husband then made bugs out of glue and wire that we stuck on the tree and on the pinata.

The beehive pinata was my first so I reinforced it with yellow yarn just in case it wasn't structurally sound. You can't tell, but I used a punch balloon and so it was huge. I filled with candy, of course, but added some bugs as well.

The other game I did quickly, was pin the spot on the ladybug. It was a last minute thing and I didn't stress over it. You can also see that I had a Caterpillar tunnel laid out in the main area for the kids.

We did a butterfly net outside, in the front.

I don't know what my thought was with this flower except that I had this planter and wanted to do a playful oversized flower.

I made bug antenna out of some cheap headbands, pipe cleaners and puffballs.

The banner was kind of a challenge because I was given a calendar with these pics on it and was asked to use it in the party, but wasn't sure how I was going to do that. I thought of place mats, but decided on this instead. It wasn't what I'd originally planned for a banner, but I actually liked the way it turned out.

As far as wrapping went. I did not want to buy wrapping paper. I had some colored paper and so I just stamped it, colored it, etc. Again, I didn't stress over this part of the party.


Finally, I made another Jax shirt with the above image for my son Jaxon. Here is last year's Jax shirt, which I did using the game jacks.
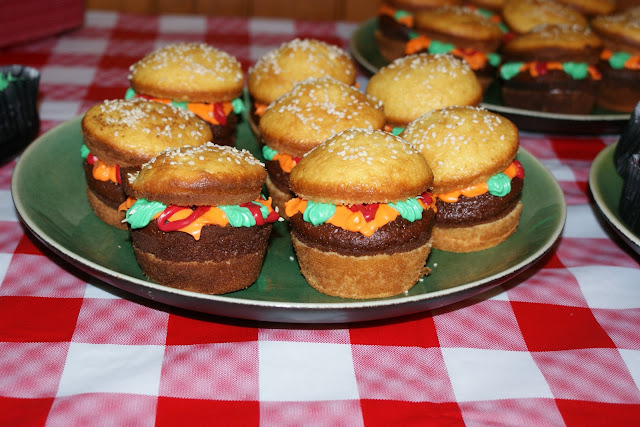
So, for my son's 3rd birthday, the whole theme came from my wanting to do the grill cupcakes (shown below) from Family Fun magazine. I thought grill- picnic, picnic-bugs. There you go, now we have a boy theme. Next step was invites. I didn't like any invites I was seeing so I did my own from scratch. Here's what the front looked like folded:

 As I mentioned food inspired, but also became a big centerpiece for, the party. We did hot dogs on a roaster, lemonade, "bug juice" from a cooler, ladybug Hors D'oeuvres, everything you'd want for a picnic; but the deserts were the real crowd pleaser.
 We changed the frosting a bit on the grill cupcakes, using red, instead of brown for a more fiery touch.

We also did cheeseburger cupcakes that turned out even better than expected. I mean these looked and tasted awesome! Kudos to my husband for doing these.
My mother-in-law did a spider cake along with some bee and bug cookies:


The table was complete with baskets and silverware covered with flyswatter papers. I made these myself on my husband's suggestion. What would I do without him?

I'll show decorations, party games and gifts in my next post.

The "Indoor picnic" part actually folded down and when you opened it, there was a shoe that folded up. Both folds held confetti bugs that fell out when opened. It might sound confusing and, believe me, it wasn't the easiest thing getting everything to line up; but it all came together nicely in the end. I also did special address labels and stamped a big bug on the envelope for an extra touch.


We also did cheeseburger cupcakes that turned out even better than expected. I mean these looked and tasted awesome! Kudos to my husband for doing these.

My mother-in-law did a spider cake along with some bee and bug cookies:


I'll show decorations, party games and gifts in my next post.
I've been wanting to do a mosaic for my outside step for awhile and finally did it. I ended up using some 1" tiles that I had on hand, but would have liked to have used bigger ones, looking back. Other than that, I think it turned out pretty well for a first time.

I didn't use a pattern, but when I was looking for patterns, I did find this site I liked: Mosaic Patterns Online - free patterns each month

I didn't use a pattern, but when I was looking for patterns, I did find this site I liked: Mosaic Patterns Online - free patterns each month


